A pathway has been found to the Dark Roundtable, a mysterious ruin filled with unimaginable danger.
Humans fear to tread in these ancient ruins as the descendants of the Dark Angels lurk deep inside. Some think the Dark Angels themselves have been sealed somewhere nearby, but there's no way to be sure. All we know is that few return from here.
According to some, the Nine Brothers of Hell are headed to the roundtable in the deep of the ruins on orders from the Princess of the Dark Angels. Who knows what dark and evil scheme she seeks to enact?
After completing Facility 13, hand the ring to the Knight at the Tavern (Heros Square) and follow the quest pointers until you complete the Facility 13 quest at the Ministry, with Zermu Terlu.
If you are soul rank 7, speak to Zermu Terlu again to get the new story quest along with the permit for Dark Roundtable.
All materials required to complete this dungeon are listed below. They are dropped by specific enemies populating the dungeon, but most can be traded or sold in player shops or the auction house.
Checklist is now complete, however I did NOT include mats needed for the 9th statue because the recipes and so the mats are randomly choosen and differ per character.
If this is the first time defeating this statue, you are unable to leave the instance until the mobs or your entire party has perished.
Mob is fast initially but slows down considerably when it is close to death.
Mob explodes upon death causing severe damage to those in range. Use ranged attack for final blow or kite mobs through traps using dash to avoid AoE explosion.
Dark Angel Statue 1.1 - Detailed Steps
Step
Action
Action Details
1
Talk to the Surname of Dark Angel (K3)
Surname of Dark Angel (Location K3)
Go to the location for the first Dark Angel Statue and speak with the Female Elf Ghost standing just outside the statue.
Choose Option 3.
2
Interact with Dark Angel Statue 1.1
Go to the Dark Angel Statue 1.1 (Location K3) and listen to the story.
3
Speak with NPC Surname of Dark Angel (K3) again.
Speak with NPC Surname of Dark Angel (Location K3) again to tell her the story you heard from the Dark Angel Statue 1.1.
4
Speak with NPC Rodrigo
Speak with NPC Rodrigo back in the first large room with the Noisy's (Large Mosquito Mob Type)
Give him 10,000 Gold to tell you everything he knows about the Altars
Note: This step is not necessary, as the rest of this guide already incorporates what he would have told you.
5
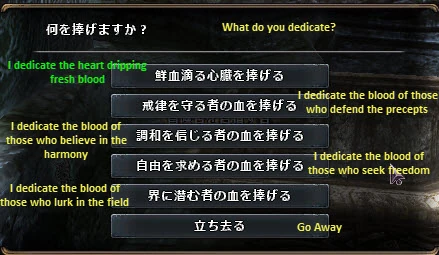
Donate Dripping Heart into Altar (Location: D6)
Hungerlust Altar Options
Go to the "Hungerlust Altar" (Location: D6) and donate (6x) Dripping Heart
6
Enter Dark Angel Statue and Complete Battle
Head back to the Dark Angel Statue and choose option 2 (Found the Body)
If this is the first time defeating this statue, you are unable to leave the instance until the mobs or your entire party has perished.
Mob type is very slow moving
Mob leaves a poison cloud upon death
Poison Guard may be beneficial
Dark Angel Statue 1.2 - Action Steps
Step
Action
Action Details
1
Examine the Dark Angel Statue (Location G4)
Go to the Dark Angel Statue 1.2 (Location: G4)
Head up the stairs right next to the 1st Final Battle Statue
Go down the right stairwell turning left at the bottom past frogs
Follow the walkway until you come to the next stairwell on your left and head up this stairwell
Exit stairwell right and follow path to Dark Angel Statue
Interact with the Dark Angel Statue 1.2 (Location: G4)
2
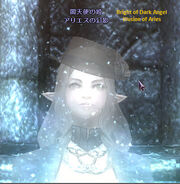
Speak with NPC Bright of Dark Angel (Location G3)
Bright of Dark Angel Location G3
Speak with the ghostly figure (NPC Bright of Dark Angel) right next to the Dark Angel Statue 1.2 to tell her the story learned from speaking with the Dark Angel Statue 1.2.
3
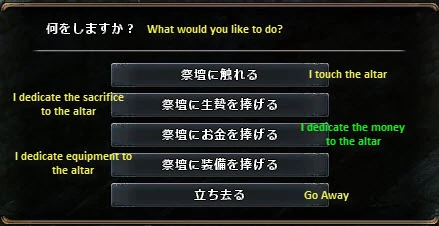
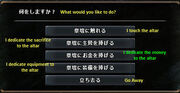
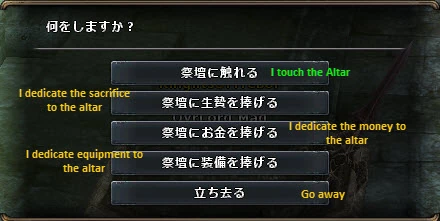
Donate Money to "Fatalpride Altar" (Location E7)
Go to the "Fatalpride Altar" (Location: E7) and choose option 3 ("I dedicate the money to the altar")
Fatalpride Altar Options
Donate 11,111 Gold to the Altar
4
Activate "Bawdrydamp Altar" (Location: F7)
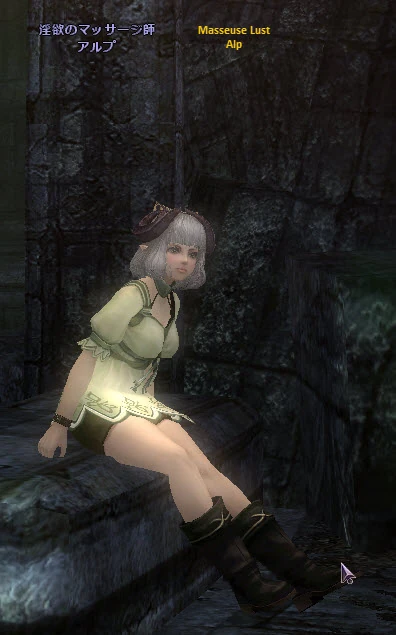
NPC Alp (Location J3)
First you need to get a massage from NPC Alp (Location J3), but you must first take off all of your equipment, so that the 12,000 Gold option appears on the menu. Choose this option to receive your massage and a buff.
Note: This will give you a buff that you need to activate the next altar. This buff will last for only 5 minutes or until you perish. You must reach the Bawdrydamp Altar within this 5-minute time-frame.
Once you have received the buff, you need to put your equipment back on and head to the "Bawdrydamp Altar" (Location: F7)
Head back up the stairwell closest to Alp (Location J3) and take the teleporter at the opposite end of the large room you come into.
Head towards the "Fatalpride Altar" taking the pathway to the right towards the Monk Type mobs.
Head past the Monk Type mobs down the stairwell.
Make your way around this path, to the next stairwell.
Note: Watch out for the Gas Clouds and Gas Traps along this pathway. You must time this correctly. This is the source of frustration during this step. If you die here, you will need to get another massage from Alp (Location J3).
When you reach the top of the next stairwell, you will need to follow the pathway to the right past the Noisies and the Monk mob types to the Altar. Again you must be careful not to perish at this point.
Bawdrydamp Altar (Location F7)
Interact with the "Bawdrydamp Altar" (Location: F7) and choose the option "Touch the Altar".
5
Activate "Jealousy Altar" (Location: E8)
NPC Pagaji
Jealousy Necklace
1/2
First you must either farm a "Jealousy Necklace" (Translated as Sonemi Necklace in Japan) from either the Raider Chief mobs or you may buy one from NPC Pagaji (Location: H3) for 7,750 Gold.
Go to "Jealousy Altar" (Location: E8) and donate the "Jealousy Necklace" to the altar.
6
Go to Dark Angel Statue 1.2 and Complete Battle
Go back to Dark Angel Statue 1.2 (Location: G4) and complete the battle.
Dark Angel Statue 1.3[]
Dark Angel Statue 1.3 - Details
Location
D4
Enemies
(5)x (Dark Snatcher) [Gargoyles]
Comments
If this is the first time defeating this statue, you are unable to leave the instance until the mobs or your entire party has perished.
Mob is easy to kite.
Mob casts Magic Missile (Low Damage) and Petrify
Mob has a Hard Normal Hit
Dark Angel Statue 1.3 - Action Steps
Step
Action
Action Steps
Multimedia
1
Interact with Dark Angel Statue 1.3 (D4)
Head to the Dark Angel Statue 1.3 (Location: D4)
Head down the stairwell, which was blocked by a vale prior to defeating statue 1.2.
Activate Resurrection Shrine #3 at the bottom of the stairs and make note of the machine to the right of the Res-Shrine.
Head down the left path from the Res-Shrine until you come to another stairwell leading up.
Head up the stairwell and as you enter the large room take the right doorway to the another large room (be mindful of the sleep traps along this path).
Once you enter the next large room enter the doorway directly across the room, which leads to the "Dark Angel Statue" room.
Interact with the Dark Angel Statue 1.3
Note: There are quite a few sleep traps along this pathway. Take care to time your movements and avoid mobs along the way.
2
Speak with NPC Princess of Dark Angel (D4)
Speak with NPC Princess of Dark Angel in this same room and tell her the story you learned from interacting with the Dark Angel Statue.
3
Speak with NPC Toto (F5)
Exit the Dark Angel Statue room.
Exit the door at the other end of the large room just next to the Dark Angel Statue room.
Once in the large room, take the doorway to the right and follow the stairs down to NPC Toto (Location: F5) [[[Kobold (Mob Type)|Kobold Mob Type]]]
Speak with NPC Toto (F5) and he will tell you how hungry he is.
4
Farm Materials
If you haven't already done so, you will need to farm and/or purchase the following materials in order to create the "Cursed Pet Food"
(6x) Spoiled Cheesecake - Purchased from NPC Pagaji (H3)
(6x) Heart of Stone - Dropped by "Arcane Smog" [[[Gas Cloud|Gas Cloud Mob Type]]]
5
Make "Cursed Pet Food"
Head back to the machine next to Resurrection Shrine #3 at location xx
Interact with the machine and select the option "Pet Food Creation Cursed" and then option "Create"
Pet Food Machine Options
Create Pet Food Options
1/2
6
Feed "Cursed Pet Food" to NPC Toto
Head back to NPC Toto (Location: F5) with the "Cursed Pet Food" and give it to him.
Note: You basically created a laxitive, in the form of pet food, and NPC Toto will run to the toilet that you passed along the way. Get ready to dig through some waste...
7
Donate "Toto Fecal Matter" into (4) Altar's
After NPC Toto returns from his unfortunate bowel movement, you will need to head to the toilet and remove some feces from the toilet.
Take the feces to one of the four "Altar's" you interacted with as part of the first two statues and donate the feces to the altar to increase the intensity of the flame.
Hungerlust Altar (Location: D6)
Fatalpride Altar (Location: E7)
Bawdrydamp Altar (Location: F7)
Jealousy Altar (Location: E8)
You will need to repeat these steps four separate times, as you can only hold enough feces for a single altar at a time.
Note 1: Digging through the toilet to acquire feces is a dirty job and you will get poisoned during this process. If you have a Poison Guard, you should equip it now.
Note 2: In "Party" mode (not worth it in 'Story' mode), there is an alternative to running back/forth between the toilet and the altar room. After acquiring the first fecal matter, you can jump into the waterway and commit suicide (recommend removing all your equipment). When you die you will appear near the "Resurrection" Shrine #2" in the altar room. If this does not happen the first time you commit suicide, when you make your way back to the altar room, commit suicide in the waterway near Res-Shrine #2 and each subsequent waterway death will result in your soul being right next to the Res-Shrine #2 putting you closer to the various altar's. Upon completing the fourth donation, you can commit suicide and warp your body to the last Res-Shrine you activated, which should be "Resurrection Shrine #3".
Toto's Throne (Location: F3)
There's poop in that toilet!
I want to collect it, inspect it, hug it and call it "George"...
1/3
8
Enter Dark Angel Statue 1.3 and Defeat Mob
Once you have donated NPC Toto's fecal matter to the Altar's to increase the intensity of the flames, you should be able to return to the Dark Angel Statue 1.3 to complete the final battle.
Dark Angel Statue 3
Location: D4
Now the magic barrier near the 2nd statue opened. Just follow the way and go up the stairs and walk to the right. Examine the 3rd statue. Talk to the princess ghost and tell her about the brother. Then go back and turn right again. Talk with Toto, he will say that he is very hungry. You need to feed the Kobold with "Cursed Pet Food". Go to the 3rd revive shrine, there is a machine where you can do this food.
After you made the food at the machine go to Toto (F5) and give him the Cursed Pet Food. He will run to the toilet. Now go the toilet which you already saw i guess and get the Kobold Dung.
Now you have to put the Dung into all 4 altars (the 3 you lit from the previous statue as well as the one you threw the hearts into) to raise the fire. You may only hold 1 dung at a time, so you will have to repeat this step 4 times in total to hit all 4 alters. After acquiring the dung, suicide in the nearby water to be brought closer to the 2nd rez statue. If jumping into the water instead brings you near the 3rd statue, then you need to run back once and leap into the water near the 2nd statue. From then on, water leaping will bring you near 2nd statue. Remove all of your weapons and armor. After placing the dung into each alter, suicide and warp back to the 3rd rez statue.
That's it, return to the 3rd statue.
Enemies: (5)x (Dark Snatcher) [Gargoyles]
Easy to kite. Cast magic missle (low dmg), cast petrify, hard normal hit. Can't go outside even as a soul.
The first NPC Gyslan you'll find when you jump down the cliff and walk straight forward. Talk with him about everything, talk again to him for every option. He will say that you need a Goat Mask. Now walk along the Cliffside to a rock where a teleporter is on it. Use and you'll come to a room with Disco Zombies. Walk again straight forward, pass the Beetles and turn right to the Dark Angel statue. Examine it. Then go back to the other side where the princess ghost is. Talk with her. Turn back again and talk with the NPC Baalzephon (a Lesser Demon). He will send you into a Final Battle with 3 Lesser Demon in it. You will need to kill one for the Goat Mask. Best Tactic is to run fast into the right/left Corner, so the mobs don't see you. Pull one use decoy in the corner and bash it. If you got the Goat, you can enter the Hell. Answer to Baalzepho will be 1. "No, one of us" and 2. "to hell".
In the hell talk to Giovanni. Then talk with the demonic Blacksmith Vishvakarman and again with Giovanni and select the second option. Now you will need another Dripping Heart (dropped by Sacrifice & Veteran Thief ), handover the Heart to Vishvakarman and you will get a quest for creating the Magical saw. You will need x1 Magical Metal Chunk (founded in a pile [I7]), x3 Armor Remains and x5 Demon's Blood. The pile you will find when you head to the end of the cliffside going up where the campfire is. Then you have to do a tricky jump on the other side.
If you got all items go back to Vishvakarman and you will get the magical saw. With this saw you have to cut the chains from 4 the petrified spiders you already saw i guess. This saw can break, but the the demonic blacksmith can repair it for 2 more Demon's Blood (IT CAN"T BE REPAIRED IF ITS TOTALY BROKEN, so it best to repair it everytime it gets chipped). Cut all the Chains and go the the Dark Angel Statue.
Enemies: 5x Harm [Spider]
They cast a big spider web that covers most of the room, touching it causes poison and paralyze.
These spiders can not see stealth, so a traditional trapper method will also work easily.
Dark Angel Statue 2 (5)
Location: Map co ordinate here.
Take now the new porter which you can reach after you made the final battle. Walk through the room and turn left at the end. Go up there till you come to a edge. Dash/Jump in direction of the plate, you will be ported to the other side. Turn left and you'll find a Imp NPC, talk with him. Jump to the other side. Now go up the stairs till you are in a big room. Turn left where the 3 Zombies are, stay at the left side, jump over it to the platform where the Hellspawn is. Turn left and go down there till you are in a room where another Hellspawn and Demon Brute are. Head right and left down a stairs, there you'll find the 2nd Statue. Now turn around, go up turn right to the end of the room and you'll find the princess ghost. Talk with her. Now you need x2 more Dripping Heart 's. Go into Hell's Square. Talk with that Imp and with the Walker. Handover one Dripping Heart for each of them. You have to find x5 Slates. One is in the room where the Imp NPC is. And the other 3 in the big room. All are easy to find. The 5th slate is the one which gives the correct hint (its bound to your character) that you need to solve this puzzle. This final slate is located down a stairwell at the end of the room that leads to the dark angel statue (with the princess ghost) past a teleporter.
Now you will need x10 more Demon's Blood and 3 Blank Contract from the Imp NPC. These items you have to forge into a pass at the Walker NPC in the Hell's Square.
Head to the statue and done.
Dremlock's notes:
Ok this is about to get confusing so hold on to your butts:
There are 5 slates. What is writen on the 5th slate is unique to your character and will correspond to one of the previous 4 slates. Depending on which of those 4 slates it corresponds with, you will have to give a specific set of 3 contracts to the reaper (as well as 10 blood). Below is what the slates say and the associated set of 3 contracts:
SLATE 1: "The unmixable elements of darkness and light were combined to reproduce an impossible transference. One element of transference can be dammed up by the banks of earth."
contract set: light, dark, water
SLATE 2: "The flame thunder is born from the mixing of fire and wind. One element of flame thunder will cut through darkness."
contract set: fire, wind, light
SLATE 3: "The bed of arrows take flight on the wind rising from the ground, hitting enemies. One element of the bed of arrows will die down when water is poured on it."
contract set: wind, earth, fire
SLATE 4: "The poisonous mist comes from the water seeping out of the ground. One element of the poisonous mist cannot exist in light"
contact set: water, earth, dark
SLATE 5:
Match for SLATE 1: "The barrier is triggered for transference, burying the living and the dead inside stone"
Match for SLATE 2: I dunno probably something about flame thunder
Match for SLATE 3: "The barrier is laid with a bed of arrows, piercing the living and the dead."
Match for SLATE 4: "The barrier is shrouded in poisonous mist, rejecting the living and the dead."
Enemies: (6)x (Doom Chaser) [Imps]
They cast Silent/Armor Decrease. Selfbuff of Attack-Aura, Magic Aura, Physical Defense & Magical Defense. Really easy to kite. One get all and just stay behind a wall, they shoot against the wall. So the other can get one out, best way with a decoy.
Dark Angel Statue 3 (6)
Location: C3
After you solved the last statue you can pass now the next barier. Follow the way and turn left, take the teleporter at the end. Go straight ahead and you will find the next revive shrine and a campfire. Find the next Dark Angel statue. After examine it, go to the princess ghost (like every statue before) and tell her about the next brother. Now back to Hell's Square. Talk with the 2 Gatekeeper's (look like a Lesser Demon) that you'll reach after you go down the ladder. They will tell you about a party of Kobolds and that you need some food and x5 Bottle's of Demon's Blood. So what you have to do exactly is, to create x3 Luxury Pet Foods and farm x15 more Demon's Blood.
TL;DR: Put 1 luxury kobold food and 5 bloods in each of the 3 camp fires.
Luxury Pet Food is made out of:
x10 Dripping Heart
x10 Rotten Marrow
x5 Foul Fat Blob
If you got the Pet Food and all Bloods you have to find the 3 diffrent Campfire's. It's a Final Battle, but very easy. The Kobolds walk in a circle and the aggro range is really low, you have to stand in front of them to get them aggro. So it should be no problem.
After you done all 3 campfires (Final Battles) you can do the Dark Angel Statue.
Additional note: this process counts for your whole party. Only one person of your party have to put the food + 5 blood into the campfires. So it would be 3x luxury food + 15 blood either for solo or for a full party of 4, doesn't matter. It's similar to hidden battles, one offers item and whole party can go inside but if you run out of time or die item is lost.
Enemies: (5)x (Nobody)
Enemies: (1)x (Deadhead)
Deadhead cast heal before he do his AoE (he is like the skulls in Decension Ruins, just a bit bigger). The Nobody's are like in F1 Statue 1 but slower, easy to kite.
- after entering floor 3 head to the highest point in the room and use the teleporter (behind 2x Greedy Devil) Stealth does not work on the Greedy Devils, however a well placed decoy will allow you to get by them.
- continue and activate the floor 3 teleporter & revive shrine
- go up the ramps and find the dark angel statue and talk to it. Return to the princess ghost near the res shrine and talk to her.
- go to Hell's Square once again, talk to Giovanni and the living statue NPC, hand him over 15 dripping hearts. He will direct you to talk to the blacksmith NPC right next to him.
- return to floor 3 and get the sacred log (past room with a lot of Succuladeth ) - its in one of the side rooms up the ramps- Once you pick up the log it will slow down your toon's speed quite a bit, making the walk back a bit difficult. Caution: if you leave the dungeon before getting back to the blacksmith NPC and making the torch you will need to start over which will mean 15 more driping hearts.
- Return to Hell's Square, talk to the smith again and get the Hellfire Torch
- Go to floor one past the 2nd revive shrine (near the sacs) and light the Altar of Fatalpride - you will receive Hellfire Torch of Fatalpride
- Go back to the third floor and light the six torches. One of the most easily missed torches is the one in the room with the Greedy Devils and tons of fake teleporters. If not all of them are lit and you try to open the statue you will be sent you to a random location in the dungeon (as if you had used a different teleporter in the dungeon.)
Enemies: (3)x (Advanced Guard) [Lesser Demon]
Lesser Demons will cast 2 Flame Arrows in a row. The rest is the usual lesser demon stuff, nothing special.
Dark Angel Statue 2 (8)
Location: Map coordinate here.
- Neccesary Items: 3 Dripping Heart, 4 Captured Rabbit, 20 Sacred Tree Firewood (both obtained in F3)
- As always, statue first - just move forward after entering the new discovered area and talk to it
- Ghost in on the right side of it in a small room (theres also the torture machine nearby which you need a bit later)
- to Hell's Square as usual and learn how to play the Melody of Awakening - this consists of 4 parts: Immolation, Suffocation, Anguish, Agony - order differes per Character
- costs 3 Dripping Heart for Melody of Awakening
T.I = Torture Instrument
Agony: Rabitt in T.I. + Hellfire of Jealouscore + 10 Sacred Tree Firewood
Anguish: Rabbit in T.I. Hellfire of Bawdrydamp + 3 Sacred Tree Firewood
Immolation: place Rabbit in T.I. Hellfire of Fatalpride + 6 Sacred Tree Firewood
Suffocation: Rabbit in T.I. Hellfire of Hungerlust + 1 Sacred Tree
- Hellfire of... = depending on your Hellfire Torch, needs to be changed at floor 1 altars
- Rabbits can be captured near the the dark angel statue and will turn into dead rabbits if you leave the dungeon
- Sacred Tree Firewood can be created by carrying Sacred Logs to a machine in the new floor 3 area (after entering teleport behind the 7th statue barrier, jump down to the left side and enter the 2nd or 3rd (safer one) entrance, turn right and go on at rigth you have wodcutting machine - after work done teleporter at right will bring you back to the guidepost and res statue [2-5 Firewood per run]. If you jump down and manage to run past coins to left in that corridor you can also acccess another res statue and secure running while dead, but its not way faster you are also slowed while dead.)
play the melodies in the order you got told and the dark angel statue will be open.. lot of running for this.
Enemies: (3)x (Fararis) [Bulls]
Bulls with Fireball, hurts a lot with low Mdef. Got on my thief ~750 dmg with 175 mdef and ~650 with 250 mdef
Dark Angel Statue 3 (9)
Location: C4
After clearing the 8th statue you can now access a teleporter, go through it and continue on the path, turning left at the junction to find statue 9. Do the usual routine where you talk to the statue and the ghost Illusion of Aries to get started. Head back to hell once again and talk to the cook Nysrok, buy all 3 recipes or find them by looking in the toilets throughout the dungeon (one in F1 and two in F2).
The cook however won't tell you how to read what's on the recipes. For that you need to speak to Giovanni, followed by the gargoyle, who will need 2Dripping Hearts per recipe. A lot of the materials you may be unfamilar with can be purchased or traded for from the Imp NPC on floor 2 that sold the contracts for statue 5. Even more material can be traded for from Nysrok. And of course a lot of monsters in the dungeon drop various things that are needed as well. The 3 recipes you recieve will vary from character to character.
Once you've gather the materials and set your Hellfire torch to the correct type, you can cook them at the pot located at F5, just turn right at the junction instead and non-porkuls will need to crouch to get in the room.
Hell's Recipes:[]
Appetizer:
Great Demon Liver Saute:
3x Great Demon's Kidney
1x Demonic Sesame Oil
3x Dimento Domestic Salt
10x Slime Extract
2x Sacred Tree Firewood
Hellfire of Fatalpride
Stuffed Magical Cranium:
4x Unclean Cranium
10x Bloody Ground Meat
1x Demonic Sesame Oil
12x Demon's Blood
4x Sacred Tree Firewood
Hellfire of Bawdrydamp
Stinkbug Scampi:
30x Stuffed Bug's Legs
2x Demonic Sesame Oil
3x Demonic Power Water
4x Dimento Domestic Salt
6x Sacred Tree Firewood
Hellfire of Hungerlust
Main Dishes:
Rotten Rabbit Steak:
12x Dead Rabbit
12x Stuffed Bug's Legs
6x Dimento Domestic Salt
1x Demonic Sesame Oil
8x Sacred Tree Firewood
Hellfire of Jealouscore
Grilled Sheep's Head:
1x Goat Skull
6x Bloody Ground Meat
1x Demonic Sesame Oil
3x Dimento Domestic Salt
10x Sacred Tree Firewood
Hellfire of Fatalpride
Pungent Marrow & Eyeball Stew:
6x Rotten Marrow
3x Demonic Power Water
10x Murky Frog's Eye
6x Foul Fat Blob
4x Sacred Tree Firewood
Hellfire of Hungerlust
Desserts:
Frog's Eye Jelly:
20x Murky Frog's Eye
6x Muddied Holy Water
2x Foul Fat Blob
4x Demonic Power Water
1x Sacred Tree Firewood
Hellfire of Jealouscore
Chewy Cheesecake:
10x Heart of Stone
10x Armor Remains
10x Broken Coin
10x Spoiled Cheesecake
1x Sacred Tree Firewood
Hellfire of Hungerlust
Blood Pudding:
30x Demon's Blood
3x Bloody Ground Meat
10x Slime Extract
3x Muddied Holy Water
1x Sacred Tree Firewood
Hellfire of Bawdrydamp
Enemies: (1)x (Dismanti) [Ogre]
Slow attacks. Easy to kite. Nothing really special.
Dark Angel Statue 4 (10)
Location: F4
Just head to the Dark Angel Statue and insert the Crystal which you got from the last battle.
Touch it and go for it!
You can do a little trickjump to reach the last Dark Angel Statue very fast.


